Netgear WMS105-10000S User Manual Page 17
- Page / 40
- Table of contents
- BOOKMARKS
- ProSafe 5 AP Wireless 1
- Management Software 1
- 2 2
- Table of Contents 3
- Chapter 6 Maintenance 4
- Getting Started 5
- Logging In 6
- System Settings 6
- Time Settings 7
- Syslog Settings 8
- Access Point Discovery 9
- IP Discovery 10
- Discovery Results 11
- Adding Access Points 12
- Wireless Configuration 13
- Advanced Wireless Settings 15
- Field or Setting Description 16
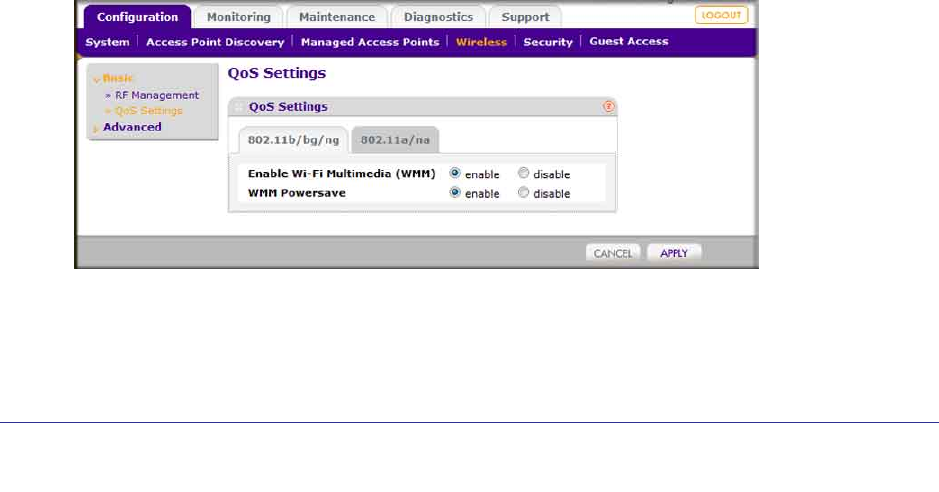
- Configuring QoS 17
- Security Configuration 18
- Editing a Security Profile 19
- Rogue Access Points 20
- MAC Authentication 21
- Radius Server Settings 23
- Configuring Guest Access 24
- Monitoring 25
- Wireless Stations 26
- Access Point Status 26
- Access Point Status Details 27
- Client Status 28
- Point > Known: 29
- Maintenance 30
- Remote Management 32
- Diagnostic Ping Window 35
- Using Discovery OUI 36
- Access Point Compatibility 37
- Index 39
- 40 40
- New Templates 40
Related products and manuals for WLAN access points Netgear WMS105-10000S
 (152 pages)
(67 pages)
(108 pages)
(122 pages)
(17 pages)
(108 pages)
(152 pages)
(67 pages)
(108 pages)
(122 pages)
(17 pages)
(108 pages)
© 2020, manymanuals.com. All rights reserved. | 0.430 s |
 Manymanuals.com
 Manymanuals.de
 Manymanuals.fr
 Manymanuals.it
 Manymanuals.pl
 Manymanuals.cz
 Manymanuals.es
 Manymanuals-pt.com
Comments to this Manuals