Netgear WG111U User Manual Page 35
- Page / 108
- Table of contents
- TROUBLESHOOTING
- BOOKMARKS
- User’s Manual for the 1
- NETGEAR Super AG 1
- Wireless USB 2.0 Adapter 1
- Technical Support 2
- Statement of Conditions 2
- FCC Information to User 2
- Declaration Of Conformity 3
- Export Restrictions 4
- Regulations 8
- Contents 9
- Chapter 1 13
- About This Manual 13
- How to Use this Manual 14
- How to Print this Manual 15
- 1-4 About This Manual 16
- Chapter 2 17
- Introduction 17
- Key Features 18
- Introduction 2-3 19
- What’s in the Box? 20
- Introduction 2-5 21
- 2-6 Introduction 22
- Introduction 2-7 23
- 2-8 Introduction 24
- Chapter 3 25
- Basic Setup 25
- 3-2 Basic Setup 26
- Two Basic Operating Modes 27
- 3-4 Basic Setup 28
- 3-6 Basic Setup 30
- Basic Setup 3-7 31
- 3-8 Basic Setup 32
- Basic Setup 3-9 33
- 3-10 Basic Setup 34
- Basic Setup 3-11 35
- 3-12 Basic Setup 36
- Status LED 37
- Color Condition Description 38
- Chapter 4 39
- Configuration 39
- 4-2 Configuration 40
- Configuration 4-3 41
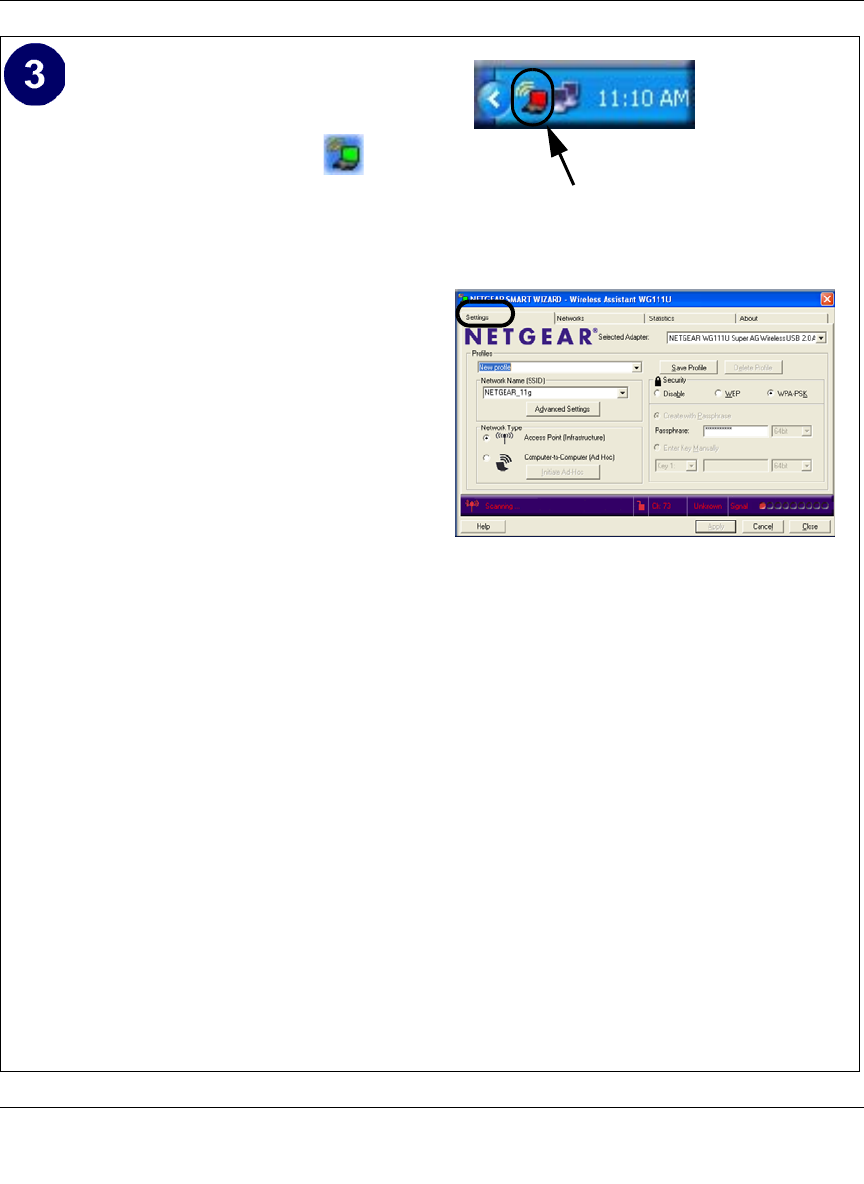
- Figure 4-1: Settings page 41
- 4-4 Configuration 42
- Configuration 4-5 43
- Figure 4-2: Settings page 43
- 4-6 Configuration 44
- Configuration 4-7 45
- Figure 4-4: Statistics page 45
- 4-8 Configuration 46
- Configuration 4-9 47
- 4-10 Configuration 48
- Chapter 5 49
- Using WEP Security 50
- Chapter 6 57
- Troubleshooting 57
- Frequently Asked Questions 58
- 5. Click Apply 59
- 6-4 Troubleshooting 60
- Appendix A 61
- Technical Specifications 61
- A-2 Technical Specifications 62
- Appendix B 63
- Wireless Networking Basics 63
- Wireless Channels 64
- WEP Wireless Security 66
- WEP Shared Key Authentication 68
- WPA Wireless Security 70
- How Does WPA Compare to WEP? 71
- Wired Network with Optional 74
- 802.1x Port Based Network 74
- Access Control 74
- Wireless LAN 74
- Is WPA Perfect? 78
- Product Support for WPA 78
- Appendix C 81
- Windows 95B, 98, and Me 86
- Verifying TCP/IP Properties 88
- MacOS 8.6 or 9.x 96
- Are Login Protocols Used? 98
- Restarting the Network 100
- Glossary 101
- Glossary-2 Glossary 102
- 202-10065-01 102
- Glossary Glossary-3 103
- Glossary-4 Glossary 104
- Glossary Glossary-5 105
- Glossary-6 Glossary 106
- Index Index-1 107
- Index-2 Index 108
Related products and manuals for Cellular network devices Netgear WG111U
 (205 pages)
© 2020, manymanuals.com. All rights reserved. | 2.151 s |
 Manymanuals.com
 Manymanuals.de
 Manymanuals.fr
 Manymanuals.it
 Manymanuals.pl
 Manymanuals.cz
 Manymanuals.es
 Manymanuals-pt.com
Comments to this Manuals